Based on a class I taught at pennsic 2010.
---
Applied Spinning, or, “I can make pretty yarn now what do I do with it?”
If you have ever had the opportunity to observe an experienced spinner at work, you already know that there is something hypnotically pleasing about watching the whirl of the drop spindle or wheel as it goes round and round. Modern spinners enjoy their craft for a similar reason; they spin because it feels good. However, every time I spin at an event or in public, I am always asked the same question: “What are you going to make with your spinning?” When I was first learning how to spin, my answer to that question would be to tell people that I was “just practicing.” Yet, as my spinning improved, giving that same answer became less and less satisfying for me. After all, in period, producing beautifully spun yarn was not the end of the process, but rather the beginning, because the yarn or thread being spun was always meant to be used for a purpose. Spinning for projects has many benefits. Learning to direct my efforts towards spinning for projects has helped me to become a better and more agile spinner. It has also increased my understanding of the mechanics of spinning, of different fibers and their properties, and it has helped me to learn a lot about period spinning and fiber arts. I only wonder at times why I waited so long to start applying my spinning.
Benefits for the Artist
Learning to spin for a specific end product has many benefits for the spinner. Different projects call for different raw materials, and this means that the spinner will need to develop the ability to work with different fibers (linen, silk, cotton) or with wool from different breeds of sheep. The spinner may also need to learn how to add varying amounts of twist to their fiber in order to create yarn of varying thicknesses for different projects. Spinning a lofty bulky yarn can feel very different from spinning a fine and tightly woven yarn. Learning how to spin in all of these different ways can be a challenge, because spinners often develop a preference for a certain material or for a certain way of spinning. However, becoming a flexible spinner is an important part of applying your spinning.
The Science of Spinning
In addition to increasing the spinner’s skill level, spinning for specific projects also leads the spinner to think much more in-depth about the fiber they are spinning. Knowing the properties of different fibers is important when picking the correct material to use for a project. For example, the wool from different breeds of sheep varies widely in the length (staple) of the fibers, in the average thickness of each fiber, and in other properties, such as the luster of the fibers and its likeliness to felt. These differences determine how the wool will feel and perform, and thus what type of project that yarn will be most suited for. A good reference book about different types of fleeces that also contains information about the properties of wool and how to care and process raw wool is In Sheep’s Clothing by Nola and Jane Fournier. A book which goes into detail about the properties of plant and animal fibers other than wool is Fiber Facts by Bette Hochberg.
Period Considerations
When reproducing period artifacts the spinner must also consider the types of fiber and the methods of fiber preparation that were available in period. For example, the properties of wool fiber in the early Middle Ages are somewhat different from much of the fiber that is commercially available today for modern spinners. The fiber available in period, especially early period, was generally somewhat coarser than what can be found today, due to the influence of modern selective breeding, making some of the processed fiber that a modern spinner might use less suitable for period recreations. However, fleeces from sheep breeds that have closer genetic ties to their historic counterparts are available for recreating historic artifacts.
Project Suggestions
If you are a new spinner, don’t worry, there are some projects you can spin for, even if your yarn is not wonderfully even to start with. The key is to look for crafting methods which are forgiving of weak spots in the yarn, particularly techniques that will not put your yarn under much tension, or techniques that will not abrade your yarn too much. Also, beginning spinners should always work with plied yarn for their early projects. The act of plying, spinning the yarn back on itself to create a double stranded yarn, gives the yarn added strength and durability. One crafting method that fits the above criteria quite well is knitting. A good book about period knitting with some project suggestions for period hats, socks, knit purses, and more, is Richard Rutt’s A History of Handknitting.
When your yarn is a bit more even, you might want to try nalbinding, a technique that looks similar to knitting, but which uses shorter strands of thread pieced together. For a project that uses a very small amount of fiber, but that may require a bit more spinning consistency you can try fingerloop braiding, a technique which, like knitting, does not abrade the yarn very much. Once your spinning becomes generally more consistent, and you are able to spin a relatively fine yarn, consider some narrow weaving projects using tape loom. Save a technique like tablet/card weaving until you are more experienced, since the turning of cards abrades the yarn much more than other weaving methods. One excellent book which provides information that will assist with project recreations such as the ones described above is Textiles and Clothing: Medieval Finds from Excavations in London, c.1150-c.1450 by Elisabeth Crowfoot.
*****
If you have never thought about spinning, perhaps this article has whetted your appetite for the art and given you a glimpse of the level of complexity involved in this deceptively simple craft. As you saw above, there are some simple, but very period projects can be completed with some of your early hand spun yarn. If you spin already, but had not considered spinning for a specific period project, hopefully this article has invited you to think outside of your comfort zone and challenge yourself to take your spinning to the next level. If you love to spin and wish to become more skilled in your chosen art, but don’t wish to learn other crafts, remember that there are other artisans in the barony or kingdom who would be eager to get hold of hand spun yarn to with. You can team up with another person who will create a period piece from your period handspun yarn. This has the benefit of encouraging you to learn to spin in different ways, while giving someone else a good period yarn to work with.
Two additional reference books of use to the beginning or more advanced spinner are:
· Handspinner’s Handbook by Bette Hochberg
· The Alden Amos Big Book of Handspinning
Questions? Please feel free to e-mail me at laralu@gmail.com
Showing posts with label Spinning. Show all posts
Showing posts with label Spinning. Show all posts
Thursday, July 28, 2011
Saturday, October 9, 2010
Teaching Spinning Outside the SCA
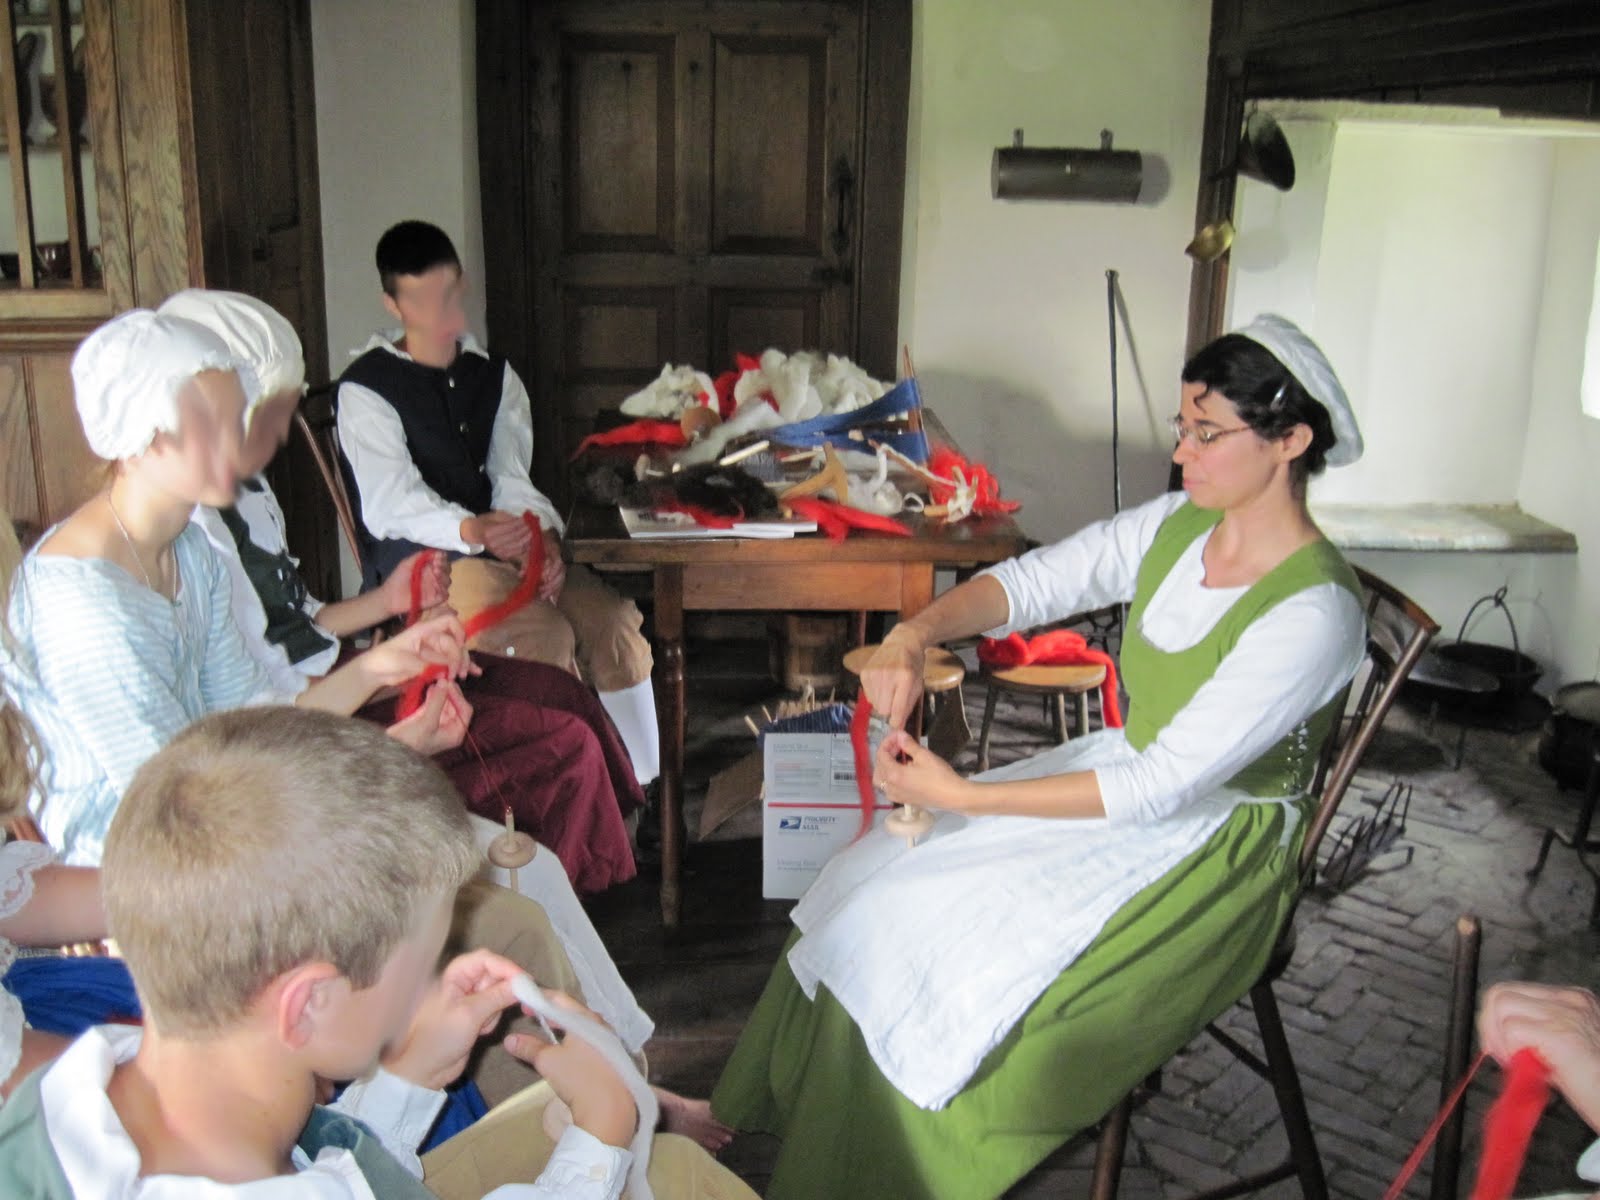 In August I was asked by the Education Coordinator for the Chadds Ford Historical Society (and a fellow Scadian) to teach a group of children and teenagers to spin. The children were learning about pre-Revolutionary war history, which is out of the SCA's time period, but the basics spinning with a drop spindle are the same! This event took place a at the Barns-Brinton House in Chadds Ford, PA.
Monday, August 16, 2010
Introduction To Spinning Class- the 2 hour version....
What to do after you have filled up your spindle
Plying: We wont all do this here, but i will tell you all about it, demonstrate it, and perhaps have a few student from the class demonstrate one of the methods of plying (plying from two balls) using sample yarn I have brought.
About Plying: When talk abut plying we are talking abut joining (twisting) together several strands of yarn. You can work with just a single strand (if you don’t want to ply at this point you would just wind your single off into a ball or a skein for finishing) but plying has some advantages. Why ply?
*Strength- When you create something with your fiber the process you use will put it under various amounts tension, stress, or it may abrade the yarn. If one strand should break the other strand(s) will hold your yarn together. This is why I would recommend plying your beginning efforts at spinning. Plied yarn is more forgiving of week spots in the yarn.
*Weight: It can be hard to spin think/bulky yarn when you are used to spinning finer yarn. Plying allows you to create a bulky yarn by joining several strands of yarns together rather than spinning a very think yarn.
*Color: For modern spinning, you can ply to colored yarns together to achieve some fun effects. In period, yarns of the same color were usually plied together.
Notes of the technique of plying: When you ply two strands of yarn you spin them together in the opposite direction that you spun each single. For example. If you spun your singles clockwise, you will ply counterclockwise. Basically, you will spin in the opposite direction of the arrow you drew on your spindle. If you forget which way you were spinning, you can also always hold the spindle up and watch it unwind.You ply in the opposite direction because you want the yarn to lay together nicely. If you ply in the same direction you will be adding even more twist to your singles and your yarn will start to coil in on itself (meaning you have over spun it)
Recommended Method of Plying for New Spinners
*Ply from multiple balls (recommended to start with). Divide your fiber in half. Spin half, wind it into a ball, Spin the other half. Then you spin them together (going the opposite way you spun your single. (demonstrate) To help manage your balls and keep them off the ground or away from cats or small children you can put each ball into a bowl. This method of plying is easy, but it does waste yarn, because you will never get each ball to be exactly even. If you have filled up your spindle completely making each ball, you will not be able to get both balls back on one spindle. Just cut the yarn and start over in this case.
Methods of plying that avoid waste of yarn
*Center pull ball- has both end so the fiber free. Can be problematic towards the end as the yarn has the tendency to tangle.
*Andean plying: wrapping the yarn around your hand to create a bracelet of yarn with each end available. You can then ply directly from the bracelet. Also the risk of turning your fingers blue if you wrap to tightly, so be careful. This method is easy, but learning the pattern to wrap the yarn around your hand can take a bit of time which is why i am not showing you that today. But I am providing instructions.
Finishing your yarn
Setting the Twist. Wetting and drying your yarn under tension will help distribute the twist more evenly along your yarn. Moisture reactivates the twist in the yarn allowing some twist from an over twisted area to travel to an area of the yarn with lest twist. You want to do this before using your yarn for a project. (demonstrate the various parts if this or have someone from the class help me do this)
*Wind your yarn into a skein. A tool called a Niddy Noddy is helpful here (the tool is period), but you can also use your feet, your arm, or someone else’s hands. However the tool does not tie you to yourself or someone else. They also come in regular sized increments so you can judge how much yarn you have. Make the skein by 1. wrapping yarn 2. tie ends together the yarn in 4 places with figure eight knot (these are more secure/less likely to slip, than if you just just wrap a piece of string around the whole skein)
*Soak the skein in water: Warm water is best. Soak for 15 minutes.
*Hang the skein to dry under tension. Coffee mug trick! However, be careful not to leave it hang for a long time or to use too heavy a weight. There should be just enough tension on the yarn to hold it straight.
Applied Spinning
Taught first at Pennsic 2010
Class Description:
Applied Spinning: “i can make pretty yarn now what do i do with it”: Why do i need to do something with my yarn? You don’t, but it has benefits, particularly when it comes to making you a better spinner! We will talk all about this in a bit
A Few Notes From the Class
This class is geared towards a specific audience.
-New spinners who want to do something with their spinning.
-Intermediate spinners who would like to expand their technique by spinning for different projects
My primary motivation in teaching this session is to get people to think about possibilities. I’m not giving details about how to complete specific projects during this class, although i will present examples from my own work.
Theory (developed with MUCH help from my teacher!)
I. What are the Benefits of spinning for a projects
-You can finally shut up the people keep asking you what you are going to do with your spinning!
-You can make some very cool and authentically period A&S projects. Spinning for a projects also solves a potential problem. Commercial yarn does not always behave like hand spun period yarn would, so your recreations might not be as accurate,
-However, the best reason to spin for a project if you love spinning is because spinning for projects makes you a better spinner because you will be called upon to spin different types of fiber in different ways. You will need to think a lot more in depth about your fiber and its possibilities.
Some of the things you will be asked to consider are.
-How the properties of your fiber determine how it will perform (different sheep breeds have wool with different properties).
-Preparation method of your fiber (example: carding v.s. combing for wool)
-The amount of twist you put into the fiber also effects the finished product (low v.s. high twist)
II. Process v.s. Product Spinners: Even if you just spin for the fun of it (process spinners) and not to use the yarn (product spinners), you can still expand your technique by spinning for other artisans who will use the yarn you spin for their own products. Consider entering into a partnership with someone!
Project Suggestions
Beginning Projects: Look for techniques that are forgiving of week spots in the yarn and do not rub or apply to much tension to the yarn. Also, try to work with plied yarn to give your yarn added strength.
-Knitting is a great starting point! I have had a student who took my introduction to spinning class knit with the very first yearn she spun. Novelty Yarn Scarff!!!
-Fingerloop Braiding is also a good technique, although your yarn will need to be more consistent in thickness, this technique does not put the yarn under too much tension or rubbing
Intermediate Techniques:
-Inkle Loom/Rigid heddle Weaving/Lucet: these projects require small amounts of yarn to be spun, but puts the yarn under more tension. May also want to use singles here.
Saturday, October 17, 2009


Tuesday, July 21, 2009
Teaching spinning
Introduction to Spinning
Everyone should leave this class knowing how to spin, at least at a basic level. It may not be pretty, but it will be yarn. After just a little bit of practice (or for some of you right away) it will also be yarn that you could, in theory, use!
If anyone is having trouble and cannot seem to get this during class, I will be happy to stay with you after class, or find another time to meet, so that we can get you more confortable with spinning.
If you want to learn to spin, you will!
Note: If this is the is the two hour version of the class, Part I will be about how to spin, and Part II
will provide you with an overview of how to process your yarn after you have spun it, and, if we have time, we can discuss what type of projects might work best for beginning spinners if you are eaget to try to do something with your spinning. Feel free to stay for only one part of the class, or for both.
-----
I. Reassure students. Let them know that the "Oh my god I feel stupid phase" is perfectly natural. It happens when we learn anything new. Your yarn will be lumpy, etc. This is natural at this point.
II. Tell students that throughout this lesson they should do the following:
V. Trouble shooting:
Everyone should leave this class knowing how to spin, at least at a basic level. It may not be pretty, but it will be yarn. After just a little bit of practice (or for some of you right away) it will also be yarn that you could, in theory, use!
If anyone is having trouble and cannot seem to get this during class, I will be happy to stay with you after class, or find another time to meet, so that we can get you more confortable with spinning.
If you want to learn to spin, you will!
Note: If this is the is the two hour version of the class, Part I will be about how to spin, and Part II
will provide you with an overview of how to process your yarn after you have spun it, and, if we have time, we can discuss what type of projects might work best for beginning spinners if you are eaget to try to do something with your spinning. Feel free to stay for only one part of the class, or for both.
-----
I. Reassure students. Let them know that the "Oh my god I feel stupid phase" is perfectly natural. It happens when we learn anything new. Your yarn will be lumpy, etc. This is natural at this point.
II. Tell students that throughout this lesson they should do the following:
- Watch me, then do (repeat this many times throughout as needed)
- Remember to sit straight, hunching over will cause your body to feel stress and make the experience of learning less enjoyable (repeat this as needed)
- Fiber Prep: drafting. (A) Break fiber into bunches two fistfuls wide, and separate each into 2-4 sections (b) Pre draft a section- till transparent, and can see hand through the fiber
- Hold the fiber in your dominant hand. Your off hand twists the spindle.
- Hook fiber onto spindle and spin the spindle clockwise- if right handed. (You can draw an
arrow on the spindle if it helps). - Park between knees. Pinch fiber with your off hand below primary hand.
- Draft fiber 2 inches or so with primary hand, dont let go with off hand yet
- Pinch with primary hand at end of draft, let go of secondary hand, watch the twist travel up.
- Holding the pinch with the primary hand, use the secondary hand to add more spin.
- Park between knees. and continue from D. untill spun yarn is at a legnth where the hand is at the nose.
- Keeping one hand pinching the fiber, remove the yarn from the hook and wind it onto the spindle, leave a small length and hook the yarn on the hook at the back of the hook.
- After a bit, ask people to break there fiber, and to practice joining. To join: predraft the yarn and the fiber (should for a small triangle). Put one over the other, pinch in the middle and then add twist.
V. Trouble shooting:
- If spindle drops at this point, start over and hook fibers in again. It may mean that you didn't add enough twist
- If there are kinks in the yarn, then there is too much twist.
- If fiber wont draft (or predraft) hold hands further apart. May be grabbing both ends of the fiber.
- If fiber gets to thin, when you draft grab above the thin part to bring more fiber in.
- If fiber gets to thick, when you draft grab below the thick part to think it out.
- If fiber gets tangled, you are petting, not drafting.
- If your joins fall apart you may not be leaving enough fiber at the end to form the drafting triangle, or, you may not be adding enough twist.
Background Notes
History
·
Spinning is thousands of years old. It likely
began well before recorded history. (AA)
·
All ancient civilizations practiced spinning.
Where textile evidence is not available, this can be inferred by other means,
such as illustrations, impressions of yarn or cord found on items, etc. (AA)
·
Up until the 15th century all yarn was
made by hand spinning. The clothes people wore, the rope they used, the sails
on their ship. Everything! (CD)
·
The spinning wheel, in its most basic form where
the wheel was spun by hand, was used in the West before 1300 A.D. (BH) You can
spin more faster on a wheel, but you can carry your spindle with you wherever
you go!
·
The 18th century saw the
mechanization of spinning. (BH)
·
These days, we are not really aware of how labor
intensive the process of making even the smallest bit of clothing actually was.
(BH)
Spinning
·
You can spin almost anything that is long, thin,
and flexible (BH)
·
The four most common fibers spun are Wool, Flax,
Silk, Cotton (BH)
·
However, people in some cultures relied on other
sources of fiber, such as alpaca camel, goat, yax, and hemp. (BH)
·
Spinning at its most basic consists of holding a
mass of fibers and twisting them --try it! (BH) The spindle adds more rotation.
Physics!
·
Many varieties and sizes of spindles have
evolved, but the two basic kinds of spindle. Top and bottom whirl. These work
on the same principle as twisting fibers by hand, but instead you are just are
attaching them to the spindle. (BH)
Gender and Spinning
·
Both men and women spun, (CD) but spinning is
seen primarily as women’s work, why?
·
It is compatible with child care. It is repetitive,
requires little attention to maintain, and is easy to put down and take up
again (EWB)
·
A lot more interesting information about
spinning, its history, and relation to gender in Elizabeth Wayland Barber’s Women’s
Work: the First 20,000 years.
Why Spin
·
Many people find the act of spinning to be very
calming
·
Others are interested in spinning because having
handspun yarn can be useful for making projects, both mundane and period ones
for use in the SCA.
·
Wool is good to start with. It is easy to spin,
not expensive, and readily available (CD)
Some Reference Books
Aldan
Amos’s Big Book of Spinning
Connie
Delaney-- Spindle Spinning : from Novice to Expert
Bette
Hochberg-- Handspinner’ Handbook
Elizabeth Wayland
Barbers--- Women’s Work: the First
20,000 years.
Spinning on the wheel


Yarn that was carded (mostly on a non period drum carder, but a bit was carded by hand) and then spun on a spinning wheel and plied.
Lucet cord for Marion
 Hand combed fiber which I spun and then luceted into a co
 rd. A full length cord was made a given to a friend.
Knitting, first attempts
 My first attempt at knitting. Its a scarf, about 2/3 of the way done. The fiber is not period, but its pretty and was a gift. I need to spin another spindle full of yarn to finish.
Something New

Linen. You see some plied linen thread on a spindle, a small skein of plied linen thread, and a bit of the tow linen that I was spinning.
After much practice

I eventually got better. There is a bit of lucet cord made from that yarn in the center of the skein.

First Attempts at Spinning

While this is not the first bit of yarn that I ever spun, this is the first full spindle of yarn that I spun, and the first spindle full of yarn that I plied. The spinning is not bad, but it is very over plied!
Subscribe to:
Posts (Atom)